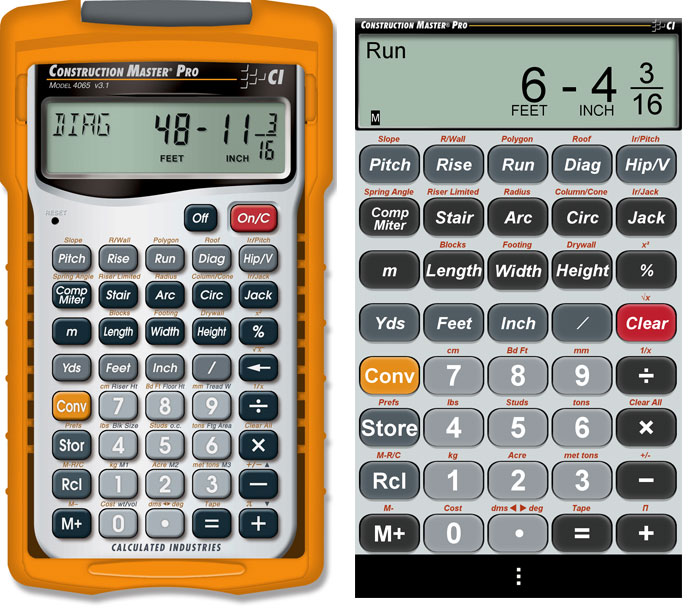
How to Measure for a Reroof
Originally written in 2014, this post takes a deep dive into measuring roofs. Requirements: Construction Master Pro calculator or app (Amazon, App Store, Google Play). The first step is to stay safe if you’re measuring a roof in person. Or, you may be able to measure with Google Earth ruler once you know the principles. For a simple rectangular-footprint roof, you can apply a pitch-adjustment to a single leg then multiply by the other leg to find the square footage of the roof. Or, just find the square footage of the the footprint, treat it as ‘feet’ rather than ‘square feet,’ and apply the pitch-adjustment to that, and consider that as ‘square feet.’ For example, a 10′ x 20′ gabled outbuilding (12:12 pitch) could be computed by saying (on the calculator): “10 foot run, 12 inch pitch, find diagonal,” then multiplying that by 20′ to get roof area. Or just 10′ x 20′ = 200 sq. ft., then say “200 foot run, 12 inch pitch, find diagonal,” and it will give you the same result of 282’10” (about 283 square feet). But for the more common complex roofs, which can be multi-pitched or switch-pitched, this method would be error-prone. So, to understand how to calculate with perfect precision, here are the principles. We will divide a very complex roof into each component roof plane and calculate for that, then sum up all the planes.
Of course, the math to calculate the area of the plane that is a rectangle, triangle, or trapezoid is pretty straightforward:
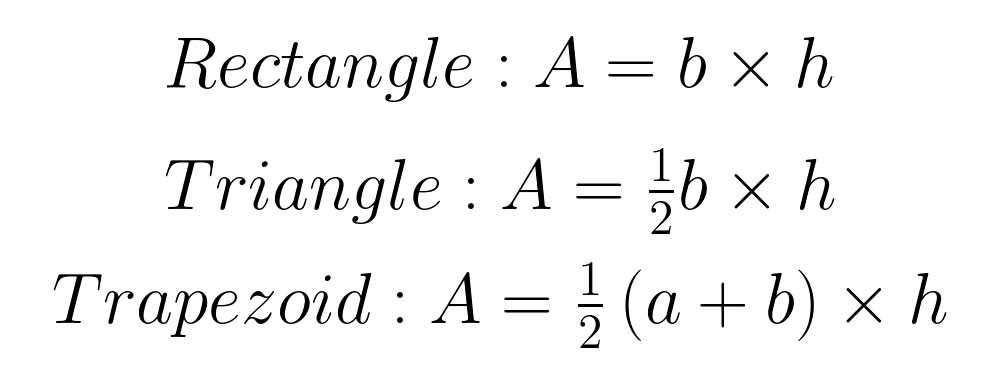
Oh yea—and the parallelogram (be careful to note that your ‘height’ is now the perpendicular distance between the two parallel lines).

To be clear, the ‘height’ in these equations can’t be directly measured with Google Earth’s ruler—it’s what I like to call a ‘slant height,’ not an absolute height (also not available with the ruler tool). The slant height is the length from the base to the top of a roof plane, if you laid a physical tape measure on it. You could also go in the attic and measure from the ridge straight down to the floor of the attic to get the true or ‘absolute’ height (not relavant here).
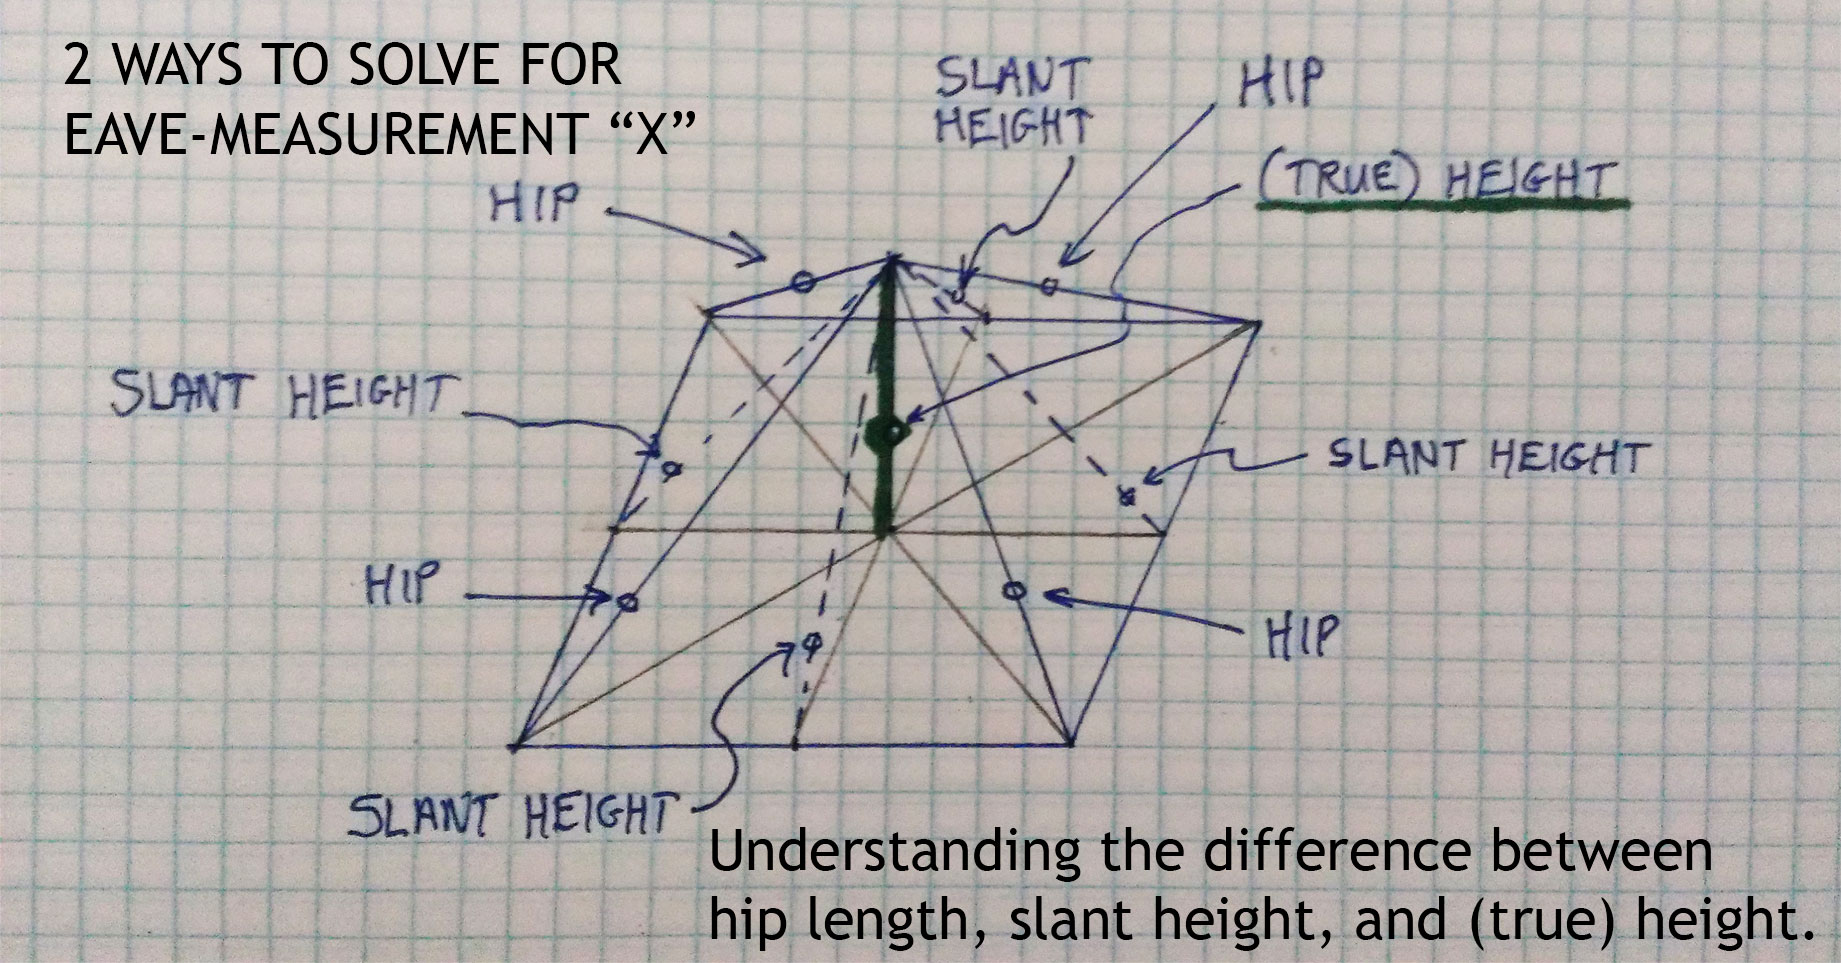
Now, let’s get to something interesting—there are three unique kinds of triangles that are present in a roof, at least abstractly. ‘Triangle 1’ has these three edges: the slant height from the base of the roof to the ridge, a projection of that line onto the attic floor, and vertical line from attic floor to ridge. ‘Triangle 2’ has a slant height edge, a hip edge, and a line that runs along the eave or base of the roof. ‘Triangle 3’ has the hip, its projection along the attic floor underneath, and the vertical line from attic floor to ridge.
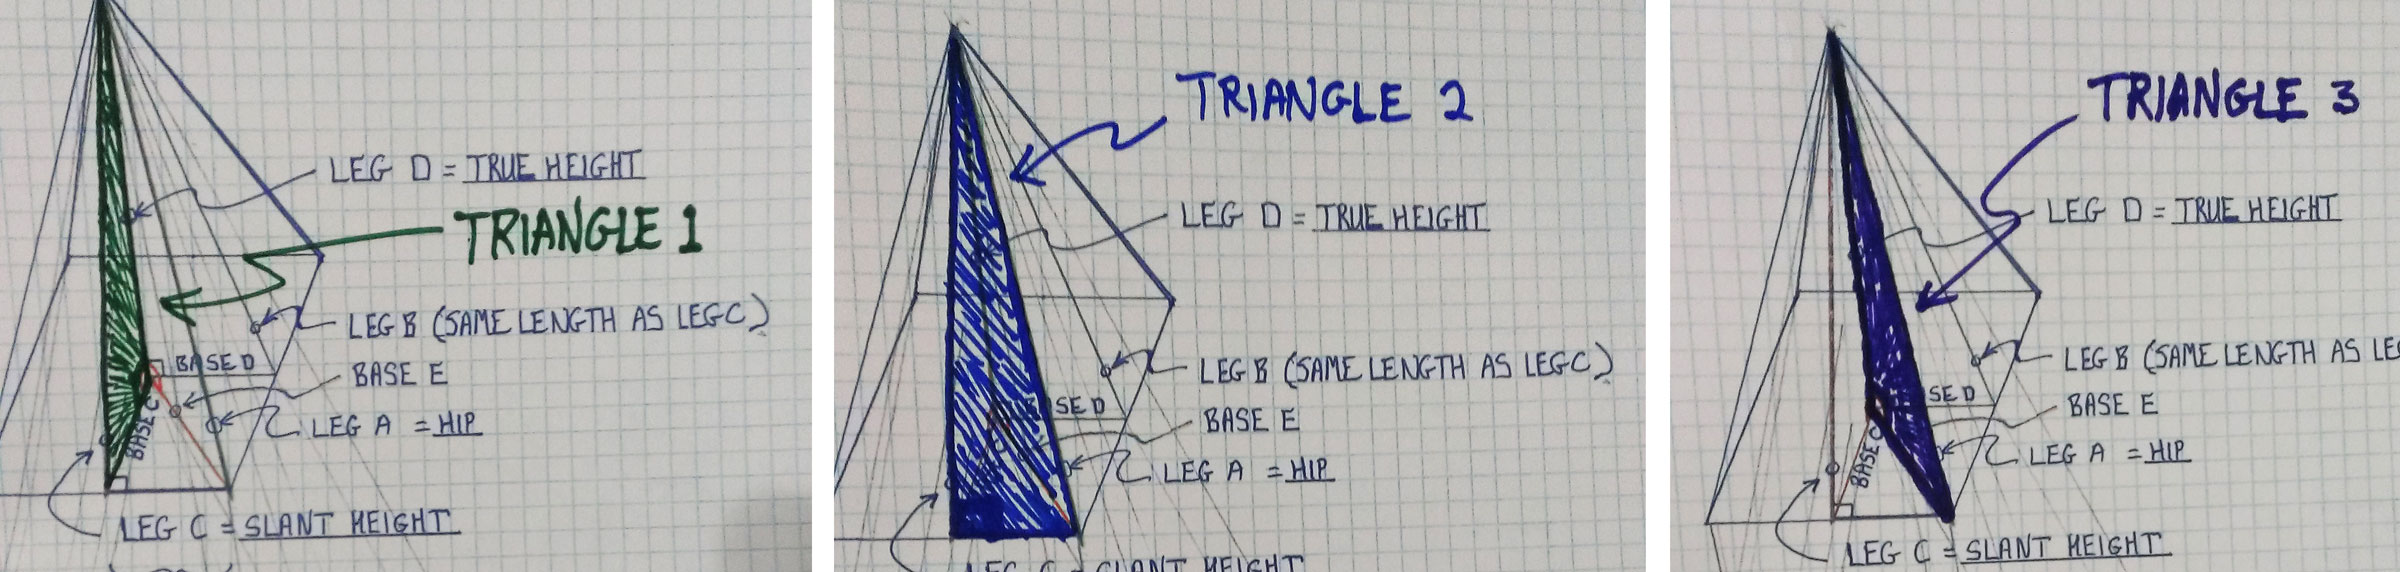
If you are looking at a roof plan, you’ll notice that two angles that appear equal there (a and b) may be very different (extreme example shown below using a very steep roof simulation).
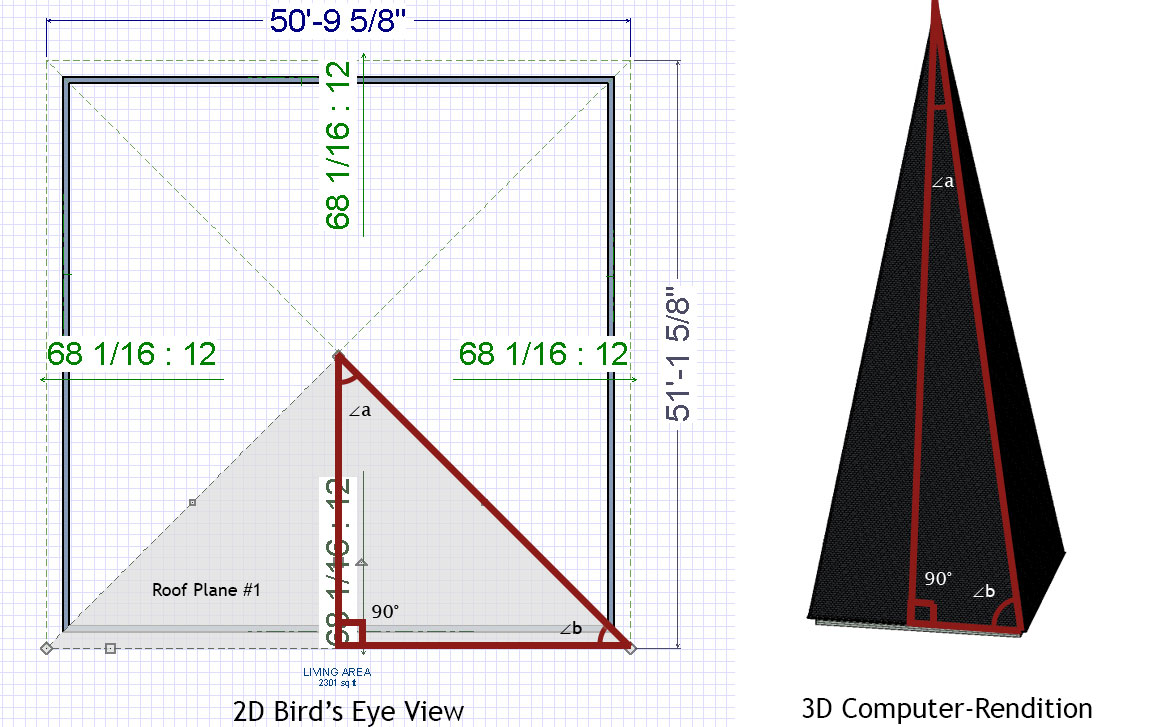
That’s because the plan view can’t convey the full 3D situation—but we know to distinguish these three triangles and their angles now.
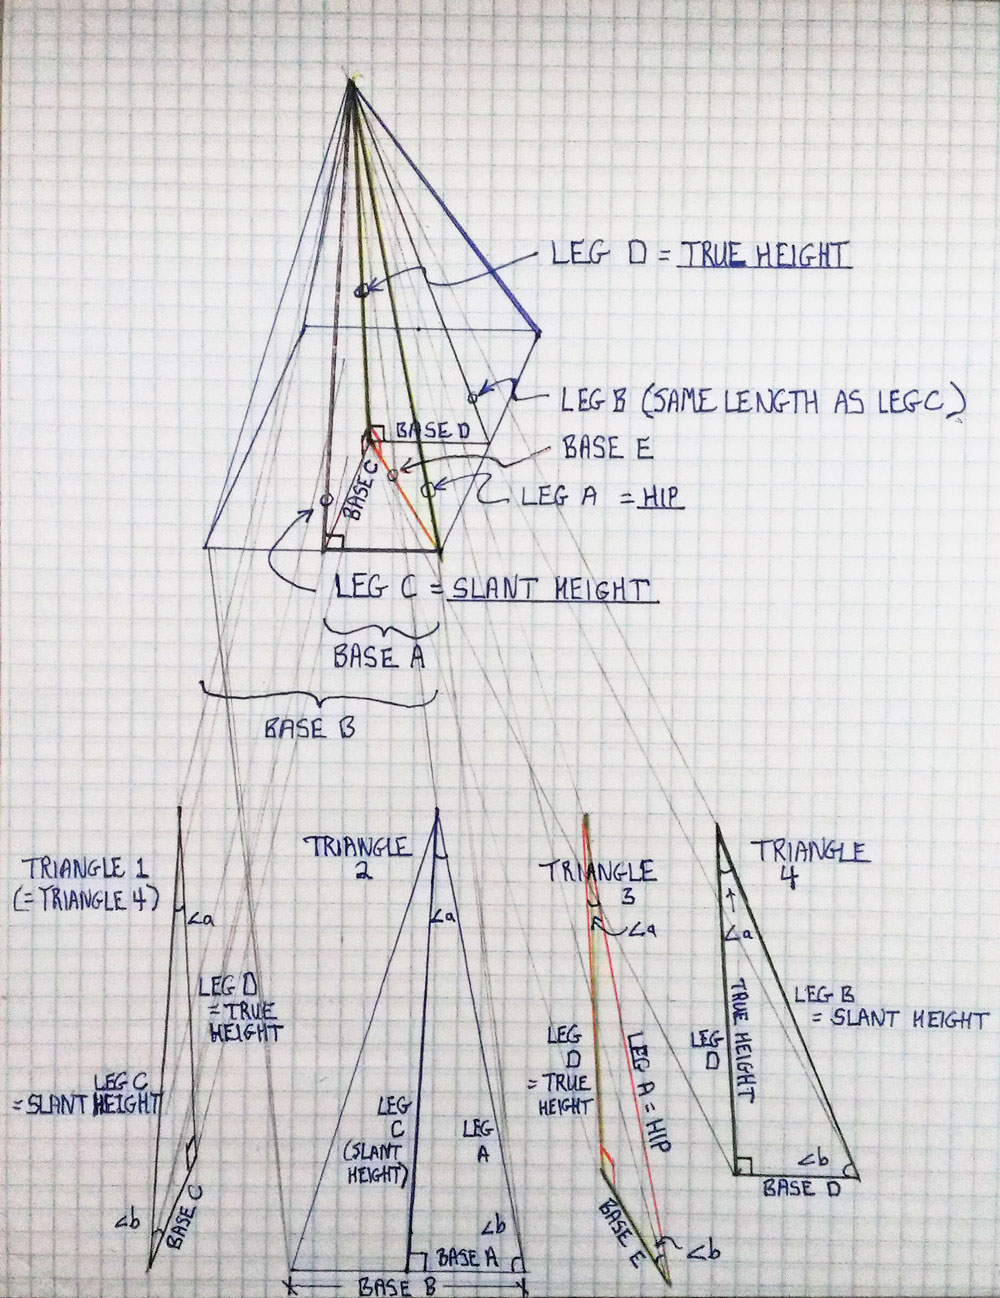
Let’s start crunching numbers so we can utilize geometric constants between these triangles.
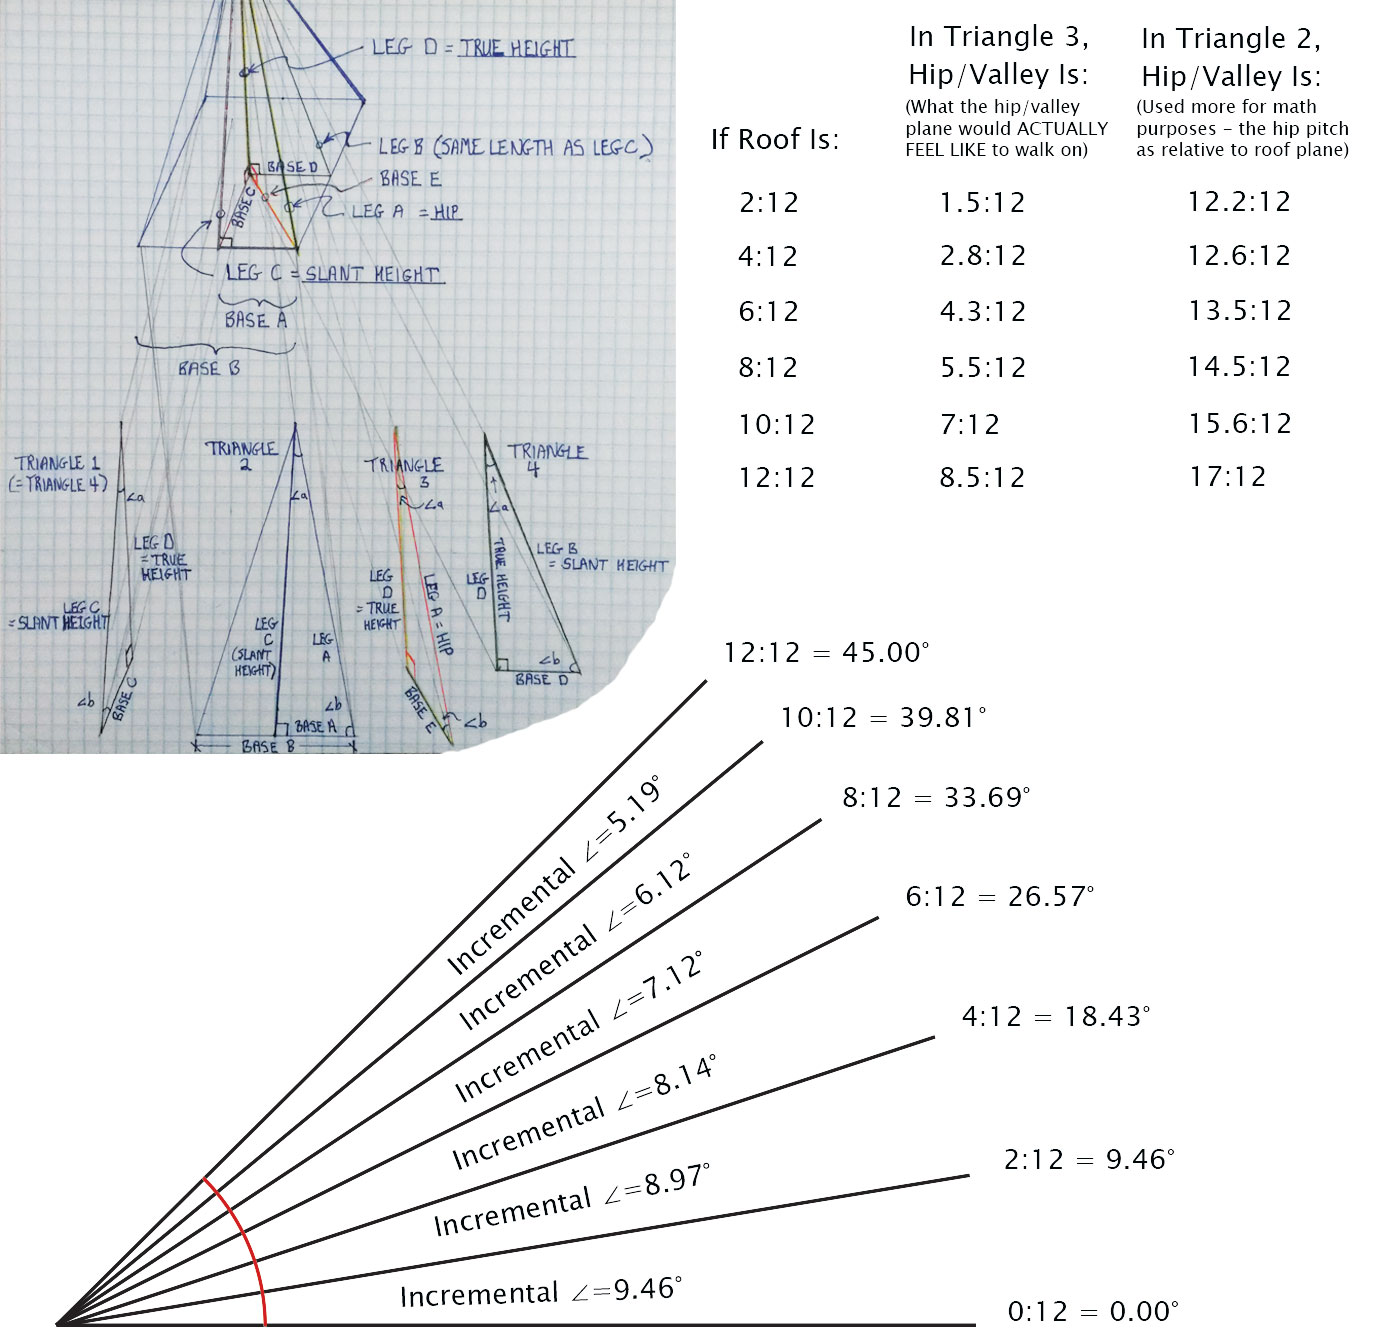
Alright, I did the work for ya. Screenshot this table or something—I’ve probably looked it up a hundred times for calculating materials or bidding jobs. I find it invaluable.
*The Hip Length and Hip Pitches Below DO NOT APPLY in the Case of a Switch-Pitch Roof!
| Roof Pitch | Slant Height (for a RUN value of 12′) |
*Hip Length (for a RUN value of 12′) |
*Hip Pitch (Triangle 2) (relative to eave/transition-run) |
*Hip Pitch (Triangle 3) (what it feels like to walk on) |
|---|---|---|---|---|
| 16:12 | 20′ 0″ | 23′ 3 7/8″ | 20 : 12 | 11 5/16 : 12 |
| 14:12 | 18′ 5 1/4″ | 22′ 0″ | 18 7/16 : 12 | 9 7/8 : 12 |
| 12:12 | 16′ 11 5/8″ | 20′ 9 3/8″ | 17 : 12 | 8 1/2 : 12 |
| 11:12 | 16′ 3 3/8″ | 20′ 2 11/16″ | 16 5/16 : 12 | 7 3/4 : 12 |
| 10:12 | 15′ 7 7/16″ | 19′ 3 3/8″ | 15 5/8 : 12 | 7 1/16 : 12 |
| 9:12 | 15′ 0″ | 19′ 2 1/2″ | 15 : 12 | 6 3/8 : 12 |
| 8:12 | 14′ 5 1/16″ | 18′ 9 1/8″ | 14 7/16 : 12 | 5 11/16 : 12 |
| 7:12 | 13′ 10 11/16″ | 18′ 4 1/4″ | 13 7/8 : 12 | 4 15/16 : 12 |
| 6:12 | 13′ 5″ | 18′ 0″ | 13 7/16 : 12 | 4 1/4 : 12 |
| 5:12 | 13′ 0″ | 17′ 8 5/16″ | 13 : 12 | 3 9/16 : 12 |
| 4:12 | 12′ 7 13/16″ | 17′ 5 1/4″ | 12 5/8 : 12 | 2 13/16 : 12 |
| 3:12 | 12′ 4 7/16″ | 17′ 2 13/16″ | 12 3/8 : 12 | 2 1/8 : 12 |
| 2:12 | 12′ 2″ | 17′ 1 1/16″ | 12 3/16 : 12 | 1 7/16 : 12 |
| 1:12 | 12′ 0 1/2″ | 17′ 0″ | 12 1/16 : 12 | 0 11/16 : 12 |
As a neat trick, you can also get the slope of a hip/valley (in triangle 3) by taking the first number of the roof slope (say, for an 8:12 roof, take the ‘8’), and divide by 17 instead of 12 (8:17).
Okay, so let’s measure a roof as an example! Here’s a 3D rendering of it, and the GIF at the start of this article breaks down all the planes.
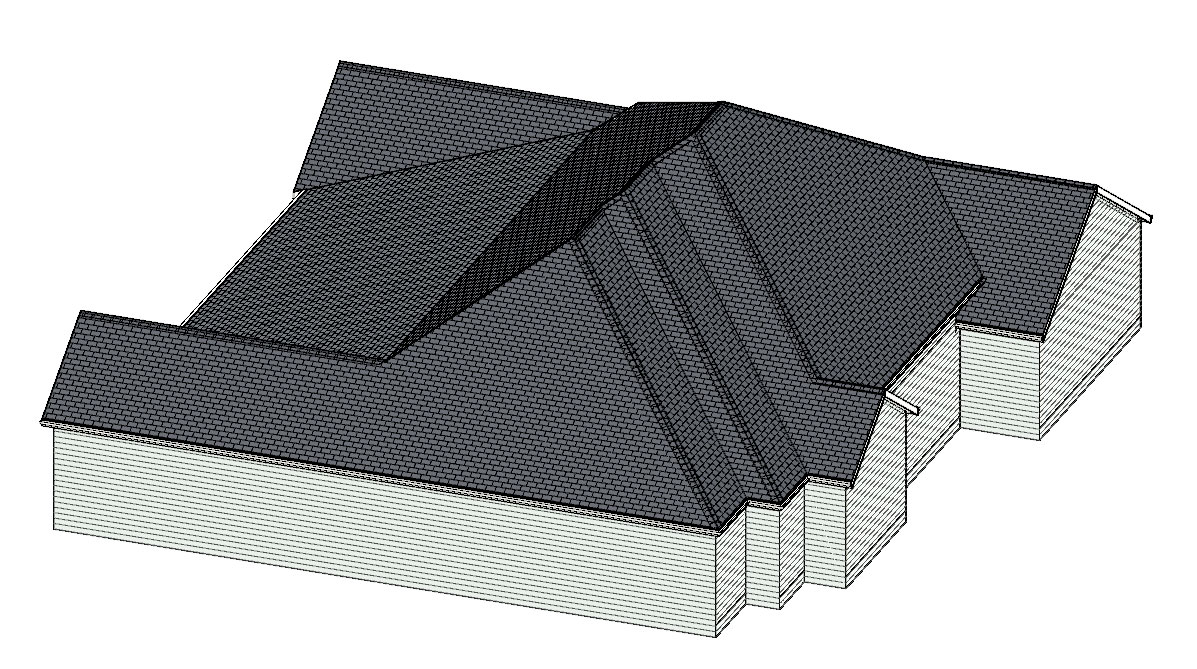
You can see the process of taking each roof plane and dividing it up into geometric shapes that can calculated. Of course, once you get a hang of it, you can estimate things more quickly and get close enough.
Using these principles, I measured this roof to have a surface area of 5,372 s.f. I also purchased an EagleView plan of this roof, and it came up with 5,376 s.f. (only 4 s.f. different!). But, this is the ‘geometric skin area’ or ‘surface area’ of the roof surface, and does not include the extra shingles needed for starter, hip/ridge waste, hip/ridge shingles, valley redundancies (overlapping portions), and general waste. I’ll give you a formula that isn’t perfect, but is pretty good for calculating redundancy in a California-cut style valley. For each course of shingles, coming from one side eats up an extra half shingle (must continue half way past valley midline), and a little more than half on the other side from waste cut and the lay-shingle (stays there as straight line). It does vary a little by roof pitch, but not much, and 3% is easy to remember: valley waste (in squares) is the total length (in feet) along all the valleys times 0.03.

And hip waste is similar but quite a bit less extensive. Each course might lose a fifth of the shingle from each side (2/5th loss per course). So we could figure the length of all the hips in feet times 0.01 (1%) to get hip waste in squares.

There’s also the hip/ridge cap shingles (whether you use cut-up 3-tab or buy the special cap shingles). To figure squares of these is simply the length along all the hips/ridges multiplied by 1′ of width. So the length of hips/ridges is the number of squares needed there. Somewhat similarly, the linear feet of starter shingles needed is the total length along the eaves and rakes. If you’re flipping 3-tab shingles upside down, multiply by 1′ width and that is the number of squares of starter. If you’re using GAF ProStart, each pack will cover 120 linear feet (consult your own brand for coverage specificity here). There may be a little waste for shingles that arrive damaged from the factory, or that accidentally fall off the roof, but this is fairly miniscule. Over time, you get a ‘gut feeling’ of how much waste there is. Often people just add 5-20%, with a roof like that shown here (being very cut up) being closer to the 20% end.