Applying Everbrite to a Copper Roof
A brand-new copper roof is one of the most striking things you can put on a building. It glows a warm salmon-pink, almost edible, for the first few months — then weather goes to work. Within a year or two it's dulled to a russet brown. Within a decade or two it's the deep chocolate of an old penny. Eventually — and we're talking twenty to thirty years in the average climate — it reaches the iconic blue-green verdigris of the Statue of Liberty.
If you want to keep that new-penny shine, you have to seal it. The most widely used product in the industry for this is Everbrite (made by Everbrite, Inc. of Rancho Cordova, California), a clear, self-leveling, UV-stable polymeric resin formulated specifically for architectural metals — copper roofs and gutters chief among them. This post walks through exactly how we applied it on a recent copper installation, what to expect over time, and an honest discussion of whether you should coat at all.
The Project
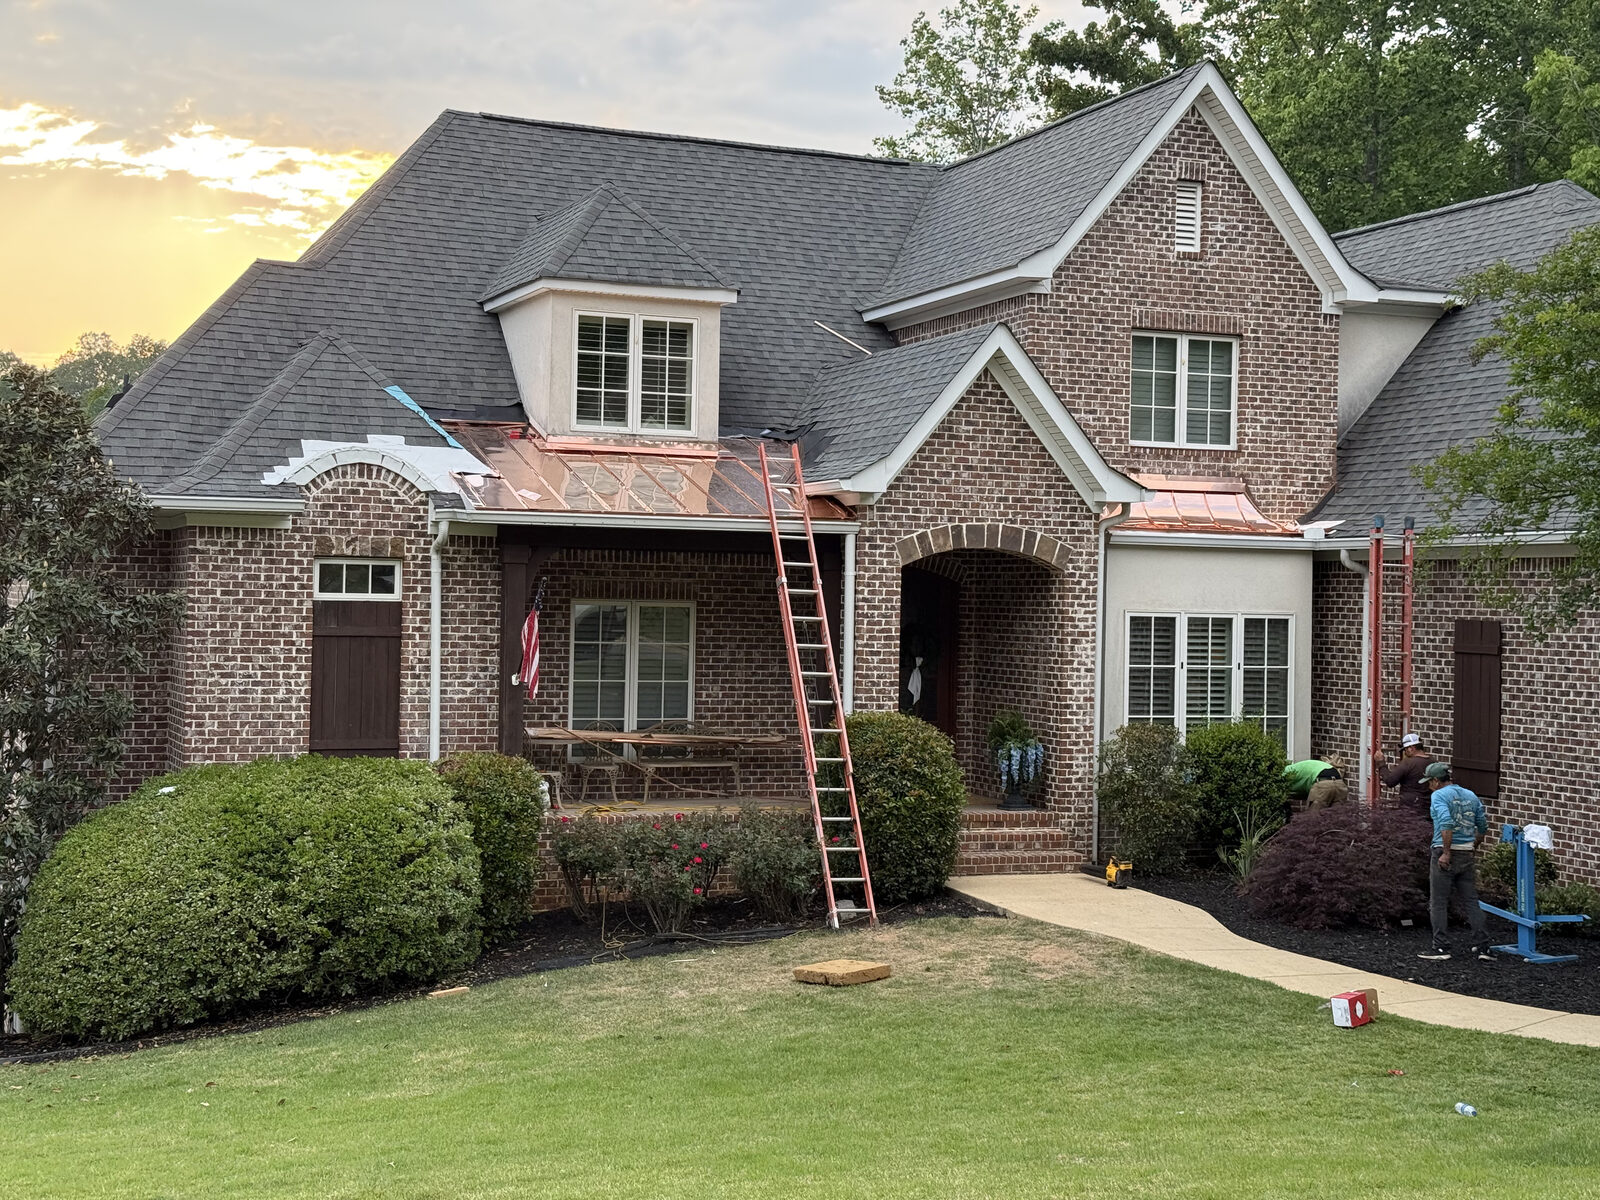
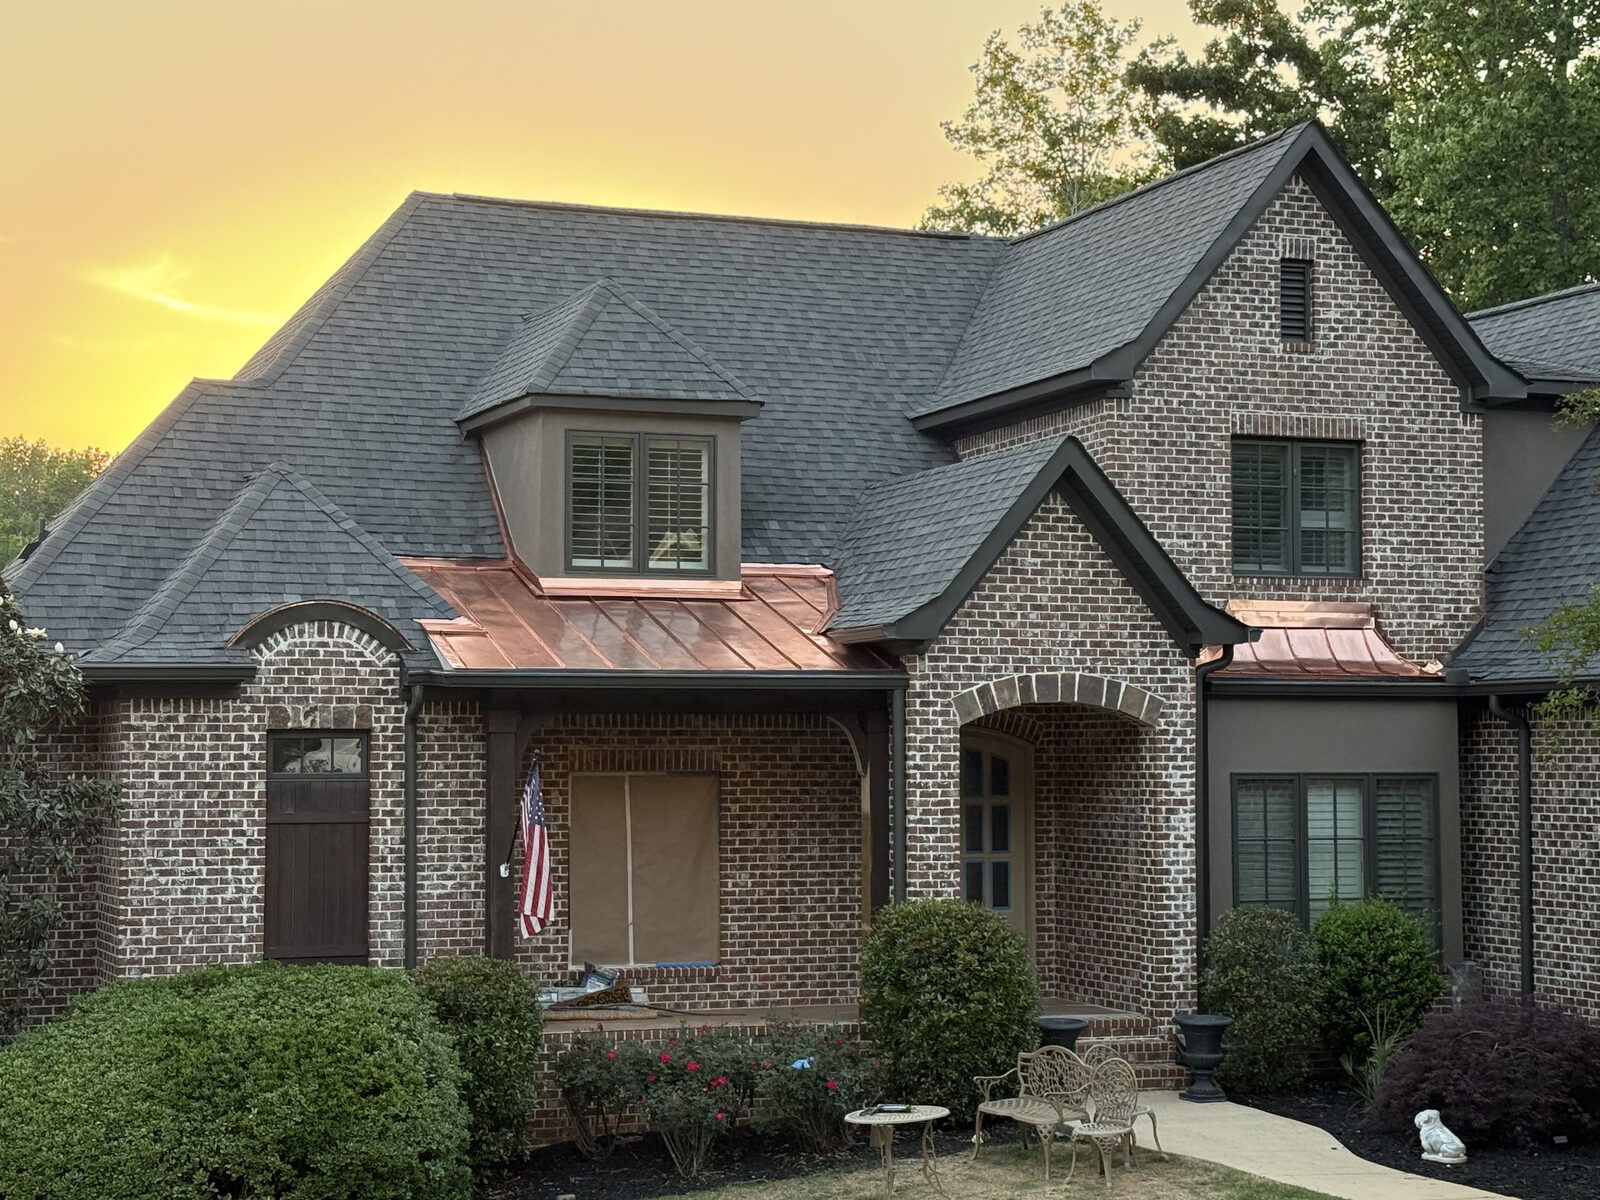
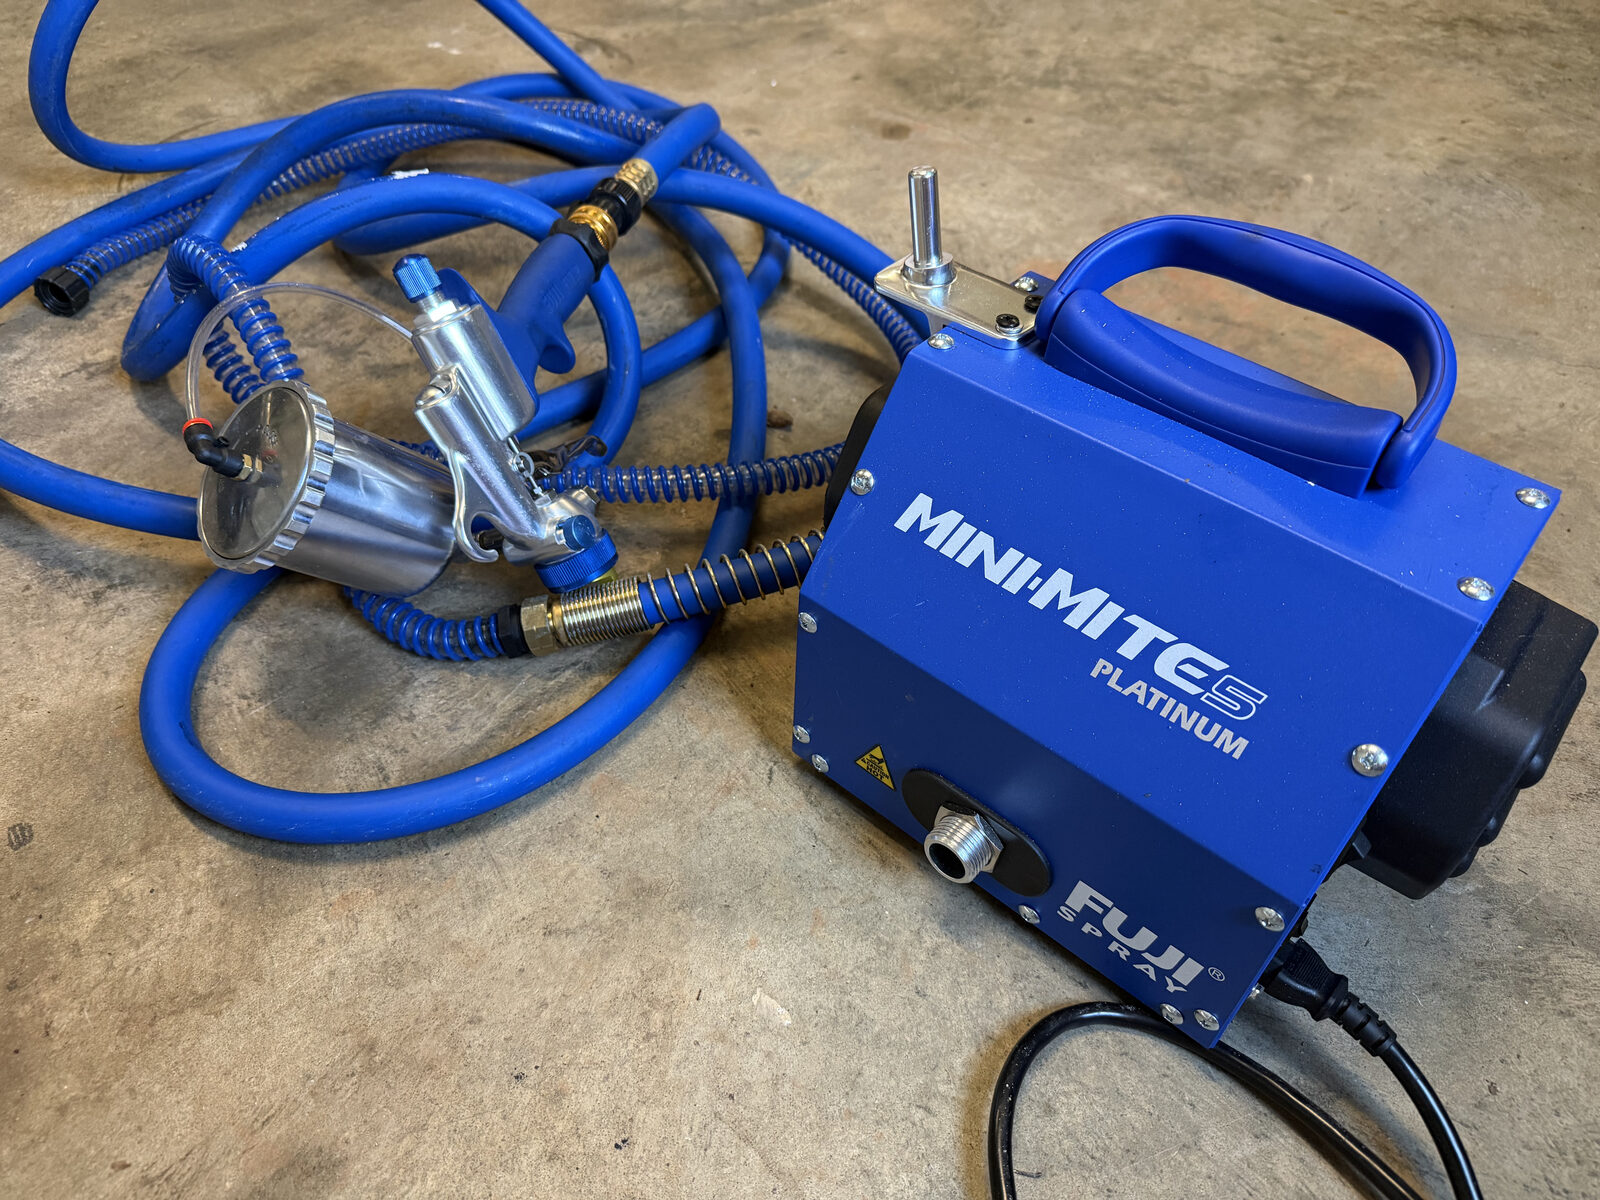
On a recent copper roof we installed in the Auburn–Opelika area, the homeowner wanted to lock in the bright penny appearance for as long as practical. We applied Everbrite over the freshly installed copper using a low-pressure, high-volume (HVLP) spray rig, sealing the entire surface in two passes.
Project Gallery
Protect the Copper Religiously
The single biggest threat to a successful Everbrite job isn't the coating product, the weather, or the spray rig — it's the dozens of opportunities between when the copper leaves the supplier and when the final coat cures for contamination to land on the surface. Every fingerprint, every droplet of sweat, every overspray from a sprinkler is a fresh defect waiting to show up as a cloudy spot or premature coating failure six months later.
This means the discipline has to start at installation, not at the coating step. From the moment the copper goes onto the deck until the final Everbrite coat is fully cured, treat the surface like a clean room.
Gloves: Heavy-Duty PVC, Not Nitrile
We wear heavy-duty PVC gloves for the entire process — installation through final coat. Nitrile gloves (the standard blue disposables on every jobsite) tear and split far too easily on the cut edges of copper panels, and the instant a glove tears, skin oil hits the metal. Heavy PVC holds up to a full day of handling without compromise.
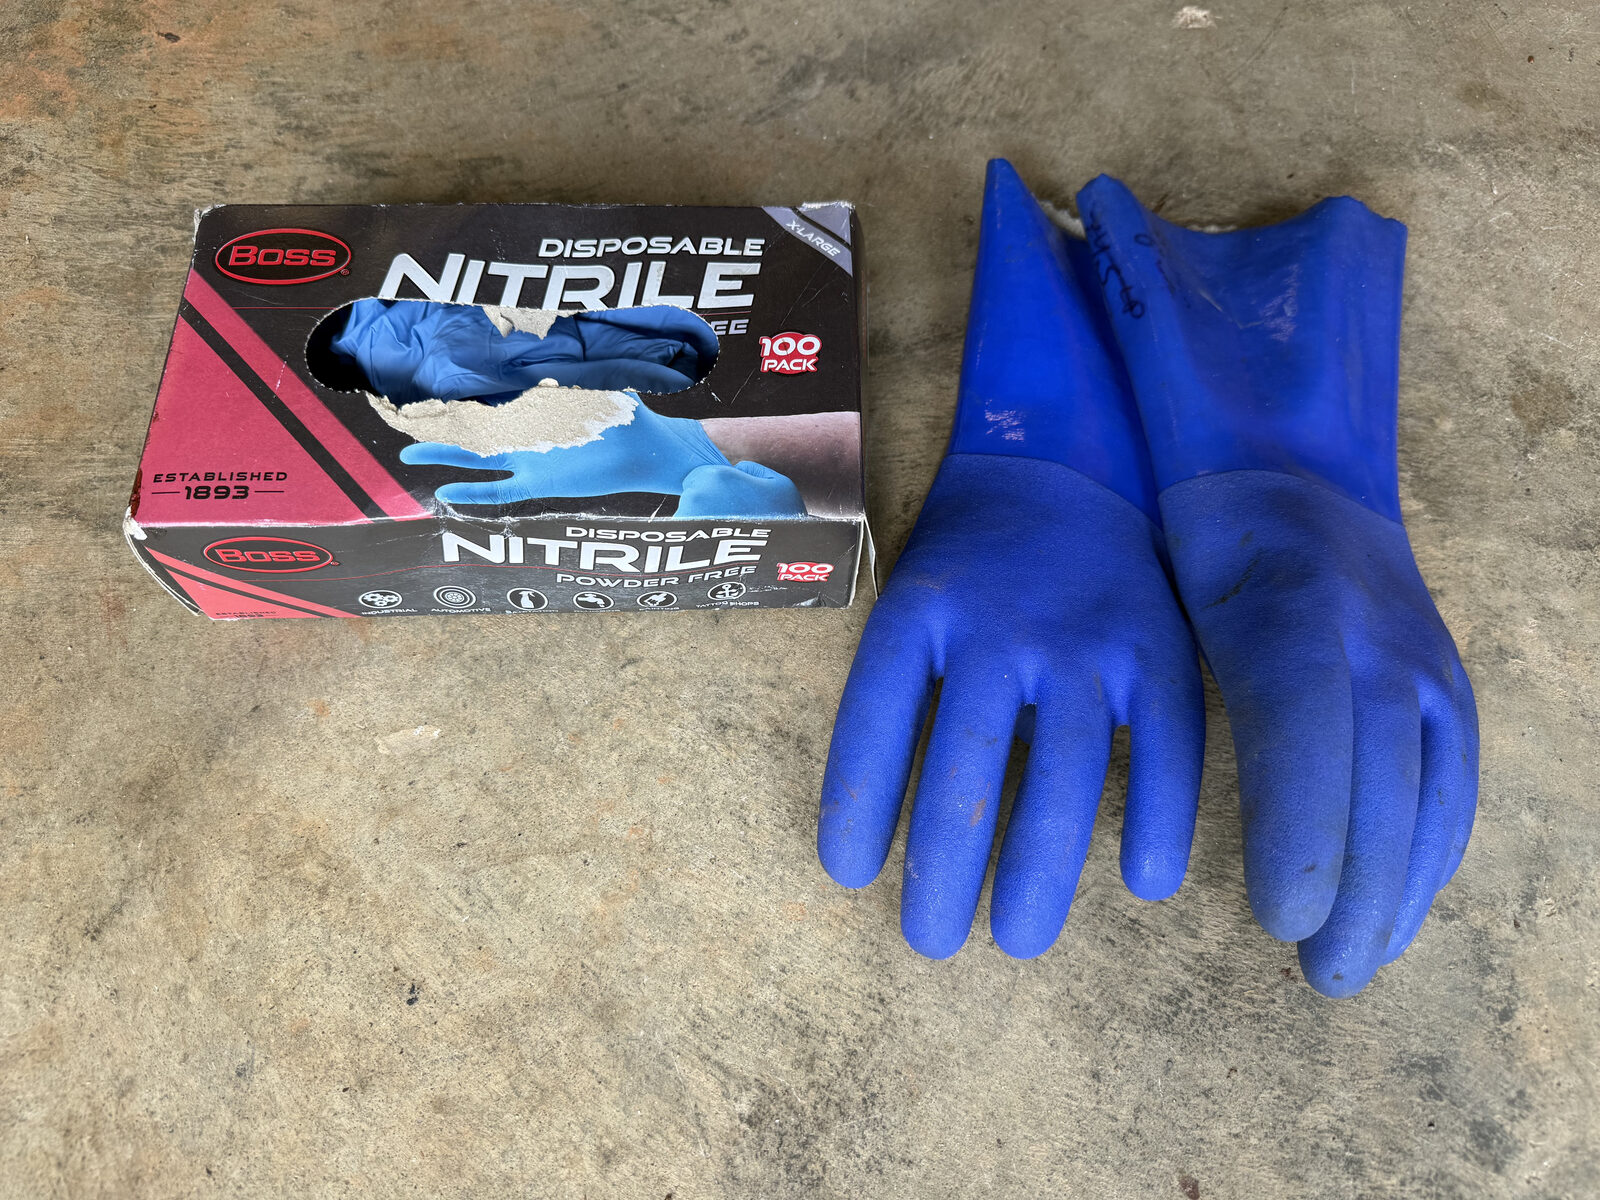
But the gloves themselves are only half the problem — the exterior of the glove has to stay clean too. If a worker reaches up to wipe sweat off his face, scratch an itch, or adjust a hat — any contact between glove and skin — that glove now carries skin oil and sweat salts on the outside, and the next panel it touches gets a fingerprint signature even though the worker never touched copper bare-handed. Once a glove has contacted skin, it has to be wiped down with EZ Prep or acetone and allowed to dry before going back on the copper. If it's heavily contaminated, swap it out.
Keep Water Off the Copper
Water is the second-biggest enemy. Not because copper minds rainwater — it doesn't — but because any water that sits on copper for any length of time leaves mineral deposits when it evaporates, and those deposits then sit under the coating forever. Sources we actively manage on every job:
- Lawn sprinklers — we coordinate with the homeowner to shut off the irrigation system for the duration of the install and coating window. One missed cycle at 6 AM and you're sanding panels.
- Other trades — painters washing brushes, masons rinsing tools, window cleaners working nearby. We ask the GC to schedule water-using trades off-site or downwind during the coating window.
- Pressure washing of any adjacent surface — driveways, siding, decks. Overspray travels farther than people think.
- Concrete and stucco dust from nearby work — alkaline and chemically reactive with copper, so any landed dust gets wiped before it sees moisture.
After the final Everbrite coat goes on, the 24-hour rain-free window is non-negotiable. Light dew after 24 hours is OK, but standing water on the roof is not until full cure (about a week, two weeks for full hardness).
Other Contamination Sources Worth Watching
- Bird droppings — uric acid etches copper visibly within hours; clean immediately.
- Tape residue from masking left up too long.
- Tree sap and pollen films, especially in spring.
- Sunscreen and bug spray on workers' arms or faces — these transfer onto glove exteriors more readily than plain sweat and are harder to clean off.
The mindset is simple: until that final coat is cured, assume anything that touches the copper is a permanent defect. The five extra minutes of vigilance during installation saves a full strip-and-recoat two years later.
Our Application Process
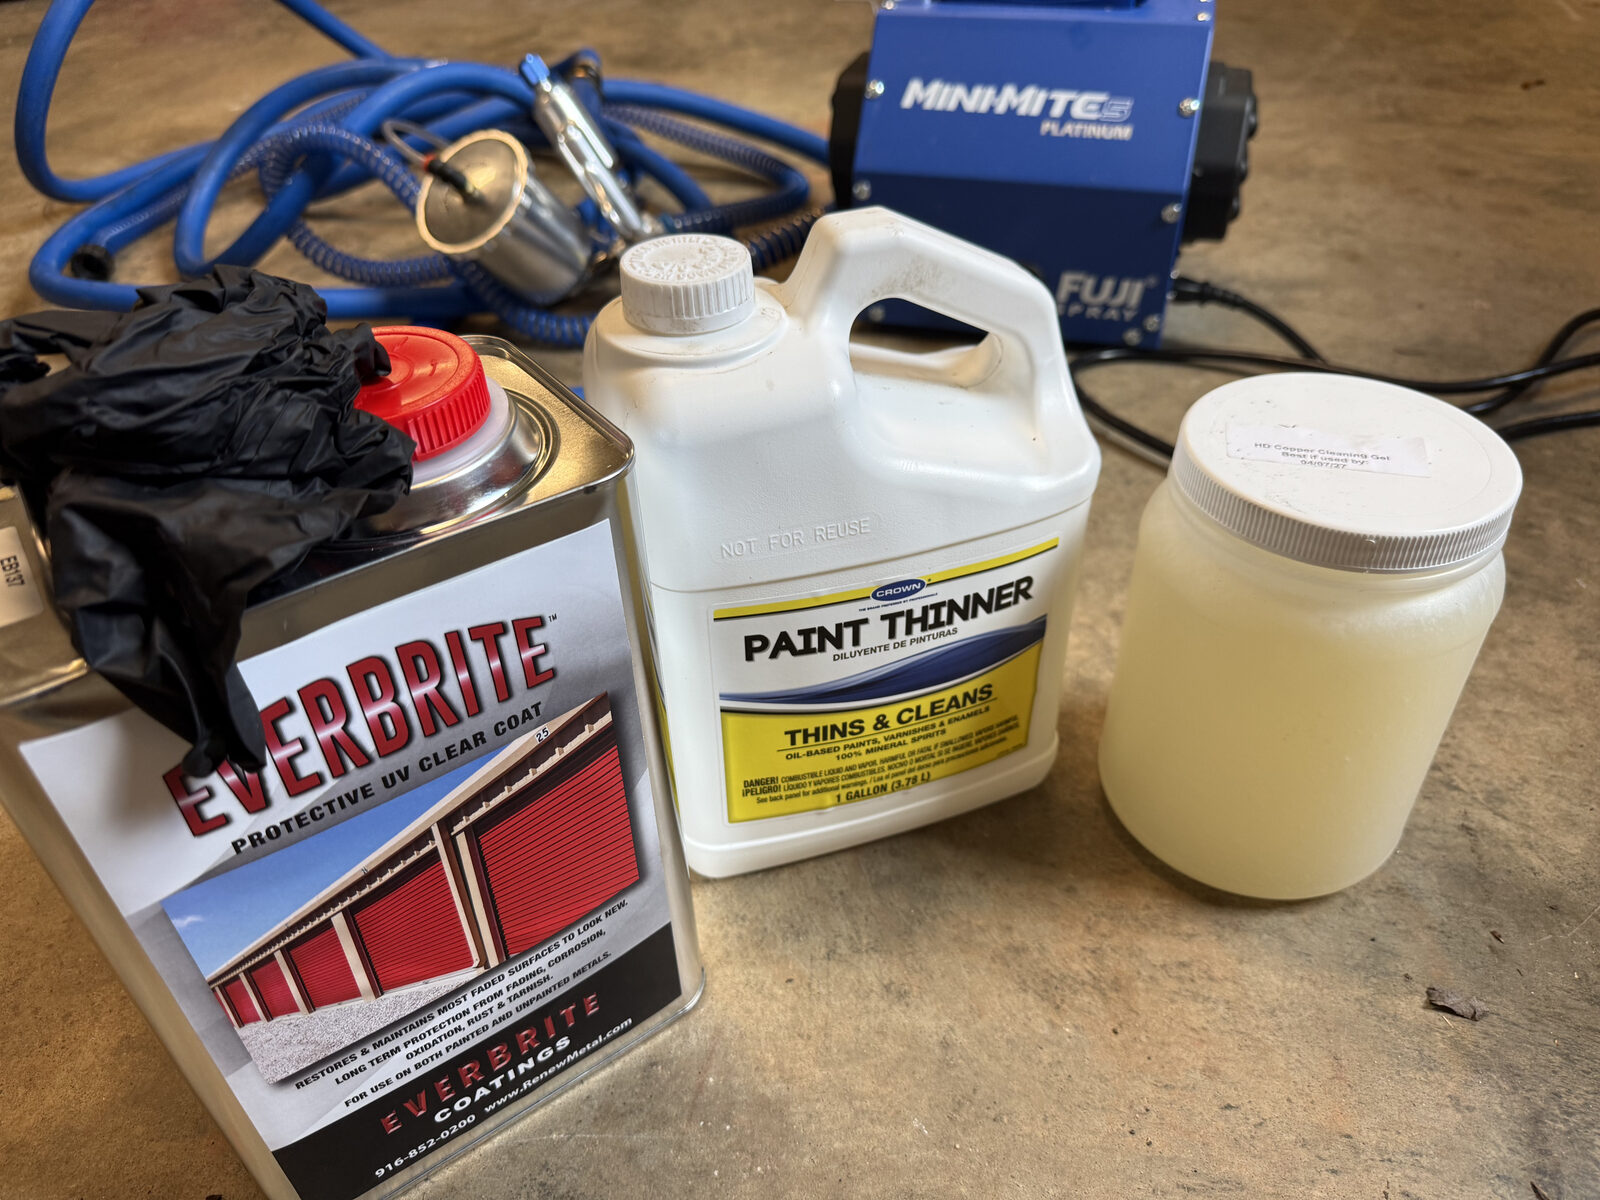
Everbrite is a two-step product: clean, then coat. That sounds simple. It isn't. The single biggest determinant of how long the coating lasts is how clean the copper is when you spray. Skin oils from installation, manufacturing residue, fingerprints, even a light film of dust — any of it will compromise adhesion and show up later as cloudy spots or premature failure.
Step 1: Surface Preparation with EZ Prep / Acetone
We wiped the entire copper surface down with EZ Prep (Everbrite's recommended pre-coat cleaner) followed by an acetone solvent wipe. This pulls off fingerprint oils, mill residue, and any wax or grease from the manufacturing or handling process. We worked in manageable sections and let each section flash off completely dry before moving on.
Critical detail: do not skip the solvent wipe even if the copper looks clean. Copper that "looks clean" almost never is — every panel has been touched, and skin oil is invisible until your coating fails over the fingerprint pattern two years later.
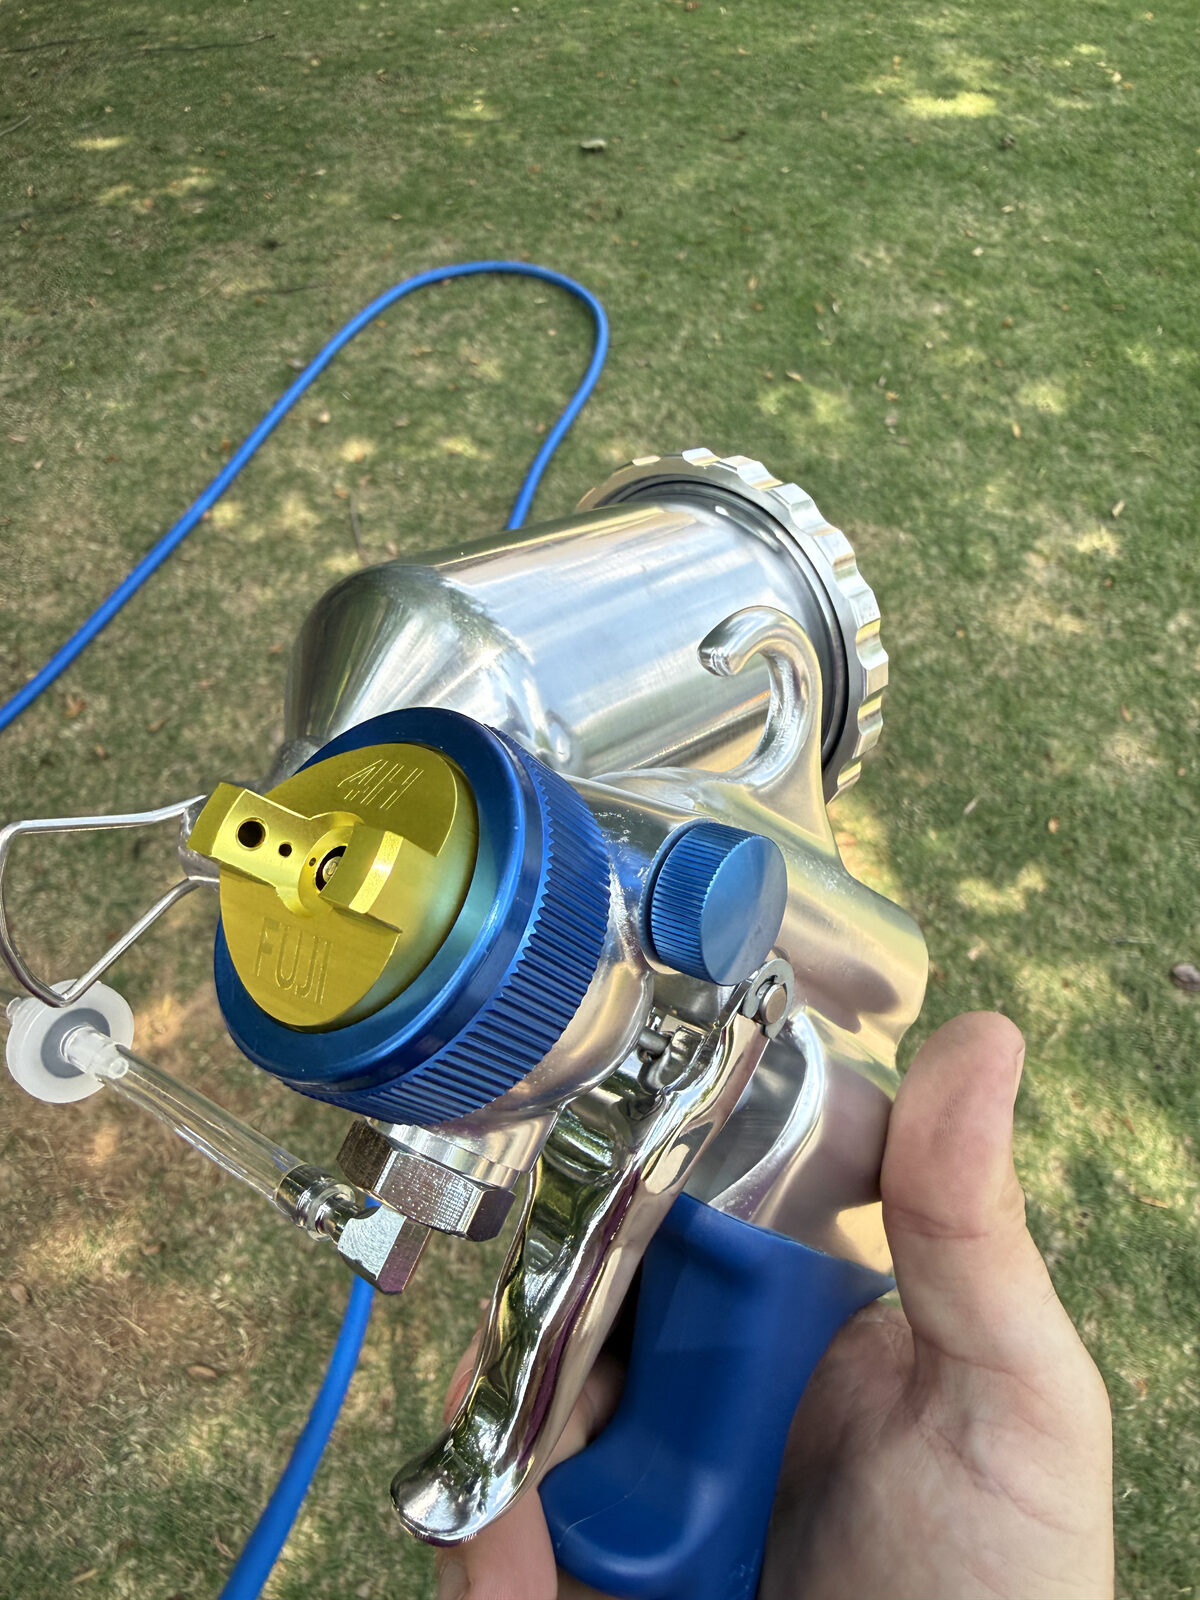
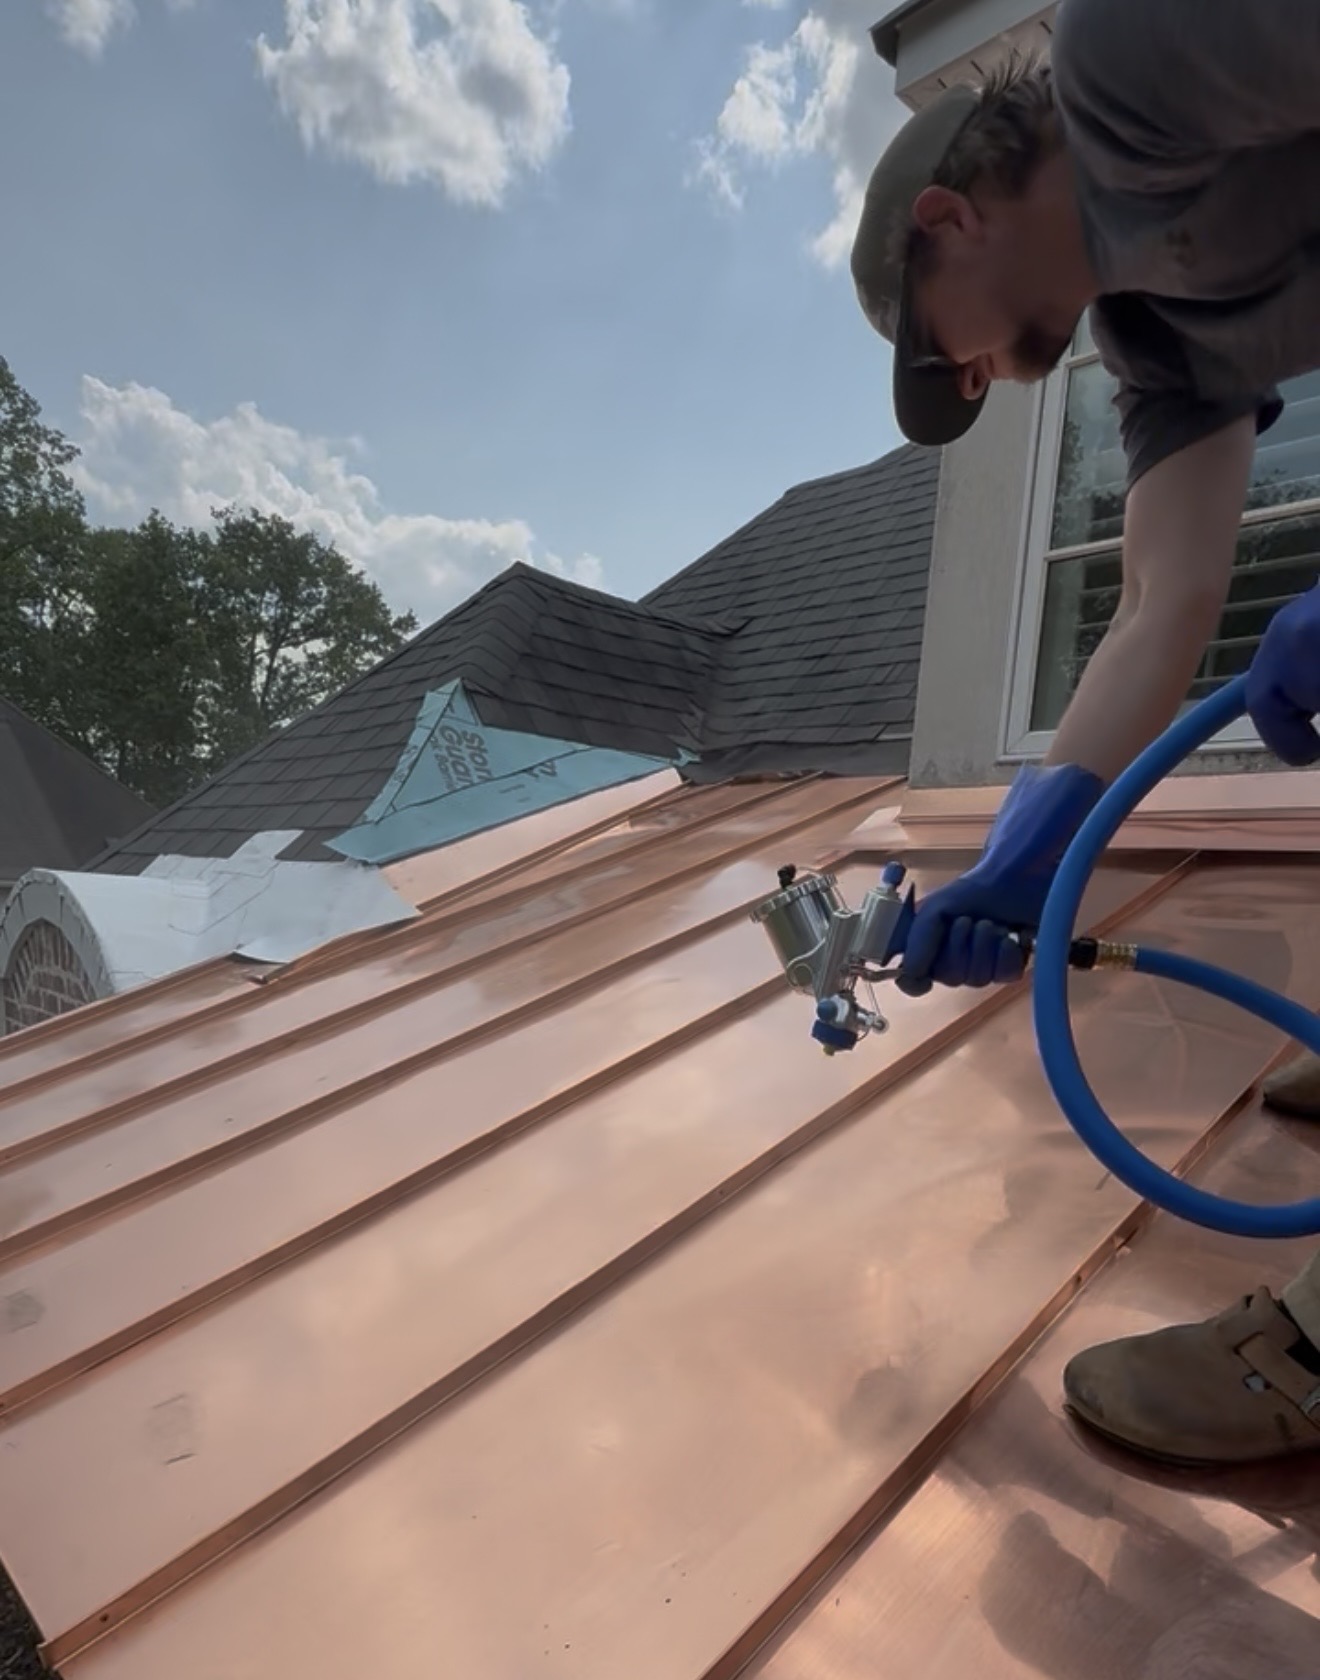
Step 2: HVLP Spray Application
We sprayed Everbrite using a low-pressure, high-volume rig — HVLP is ideal for this product because the coating is self-leveling and you want a smooth, wet film without atomizing it so finely that it dries before it lays flat. Heavy overspray and excessive air pressure are the enemy here.
Process notes from our install:
- Two coats minimum. Everbrite is self-annealing — the second coat chemically bonds into the first and behaves as a single film. Wait at least one hour between coats, or until the first is dry to the touch.
- Watch the weather. Surface temperature needs to be between roughly 40°F and 100°F. More importantly, no rain or heavy dew for the first 24 hours after the final coat — moisture during cure will produce white milky patches that mean stripping and starting over.
- Even overlapping passes. Avoid pooling, especially at panel laps and standing seams where coating can collect in low spots.
- Cure time. Coating is dry to the touch in a couple hours, functionally cured in 4–5 days, fully cured in about two weeks. The copper is reasonably safe from light dew after 24 hours but treat it gently for the first week.
Step 3: Cleanup
We cleaned the HVLP rig out with standard paint thinner (mineral spirits). Xylene or lacquer thinner also work and are what Everbrite officially recommends for solvent removal. Run thinner through the system until it comes out clear, and store any unused Everbrite tightly sealed — the can will skin over fast once oxygen gets to it.
Caveats and Realistic Expectations
Everbrite is the best product we know of for what it does, but it is not magic. Anyone considering this coating should understand the trade-offs going in:
- This is a maintenance commitment, not a one-time job. Everbrite is essentially a sacrificial UV barrier. It does its job by degrading slowly so the copper underneath doesn't have to. That means it will need to be reapplied.
- The shine is muted, not glassy. Compare the "before" and "after" gallery images — there's a slight softening of the finish. Most clients prefer this; a few are surprised by it. Worth setting expectations on.
- It cannot bring back already-oxidized copper to penny-bright. If the copper has started to brown, you need to polish or sand it back to bright metal first. Coating dull copper just seals in dull copper.
- Stripping and recoating is more work than the first application. Old Everbrite is removed either with xylene/lacquer thinner solvent stripping or by sanding (Everbrite specifically recommends sanding for copper roof areas — start at 400–800 grit, work up to 1800–2000 for the final pass before recoating).
- Power washing is a no. Once coated, the roof gets washed by hand with mild soap and water. High-pressure water will eventually drive moisture under the film.
How Often Does Everbrite Need to Be Reapplied?
Everbrite's official guidance is that the coating lasts 3 to 7 years on most exterior applications, and 5 to 10 years on surfaces that are shaded. Hot, sun-exposed Southern roofs are at the shorter end of that range. In our experience on Alabama installations, planning for reapplication every 2 to 5 years, or as needed when the finish begins to chalk or dull, is the realistic interval.
The good news is that touch-ups and recoats are much cheaper than the original installation, because the prep is lighter — you're not stripping back to bare metal, just cleaning and recoating an existing film with a fresh layer that self-anneals into the old one. The coating can be maintained indefinitely this way.
The Other Option: Let It Patina
Before sinking into a multi-decade maintenance cycle, it's worth considering the alternative: doing nothing at all. Copper is famously self-protecting. As it oxidizes, it forms a stable layer of basic copper sulfate and carbonate that actually shields the metal underneath from further corrosion. This is why old copper roofs on European cathedrals are still watertight after three or four hundred years.
The progression looks roughly like this in a humid Southern climate:
- Months 0–6: Bright salmon-pink — the new-penny look.
- Year 1–3: Darkens to russet, then deep chocolate brown.
- Year 5–15: Mottled dark brown to nearly black, with the first faint blue-green flecks beginning to appear at edges and water-exposed areas.
- Year 20–30+: Full blue-green verdigris — the Statue of Liberty look. (The Statue itself took roughly 30 years to fully transition.)
Coat vs. Patina — Honest Pros and Cons
Coating vs. Natural Patina
| Factor | Everbrite Coated | Let It Patina |
|---|---|---|
| Appearance | Penny-bright copper preserved (with slight muting) | Brown → eventually green; mottled and uneven |
| Maintenance | Recoat every 2–5 years; hand wash only | Essentially zero for the life of the roof |
| Lifetime cost | Higher — ongoing recoat labor and material | Just the original install |
| Roof lifespan | Same as uncoated — copper underneath is the same | 100+ years; patina is protective |
| Risk of poor outcome | Cloudy spots if cured wet; failure if prep skimped | Uneven streaking from rainwater runoff patterns |
| Best fit | Owners who specifically want the new-copper look | Owners who want classic patina or zero maintenance |
There's no universally right answer. A historic Victorian whose owner wants the look of a hand-laid copper roof at the height of its newness — coat it. A church or institutional building whose owner wants a heritage green patina and won't be paying maintenance contractors every few years — let it go.
Accelerated Patina: The Historic Urine Method (and Modern Equivalents)
For owners who want the green patina look without waiting two or three decades, copper can be chemically encouraged to oxidize. The chemistry is straightforward: copper reacts with chlorides, sulfates, and ammonia compounds to form the colored copper salts that give patina its color.
Historically — and this is genuinely true, not an internet myth — Old World builders' crews used to urinate on copper roofs once a week over the course of a few months to force the patina. It works because aged urine breaks down into ammonia (from urea) and contains dissolved salts. The same chemistry was reportedly used with horse urine, which is even more ammonia-rich. Frank Lloyd Wright specified a similar process on some of his copper-roofed projects, though he used a more refined formulation.
The modern, professional version of this is an ammonia-and-salt patina solution. A common formulation:
- 1 quart water
- 1 oz household ammonia
- 1 tablespoon salt
- 1 tablespoon ammonium chloride (sal ammoniac)
The solution is spray-applied to clean copper, allowed to dry, and reapplied repeatedly over several days or weeks. Different ratios produce different colors — ammonia-dominant solutions trend blue, vinegar-and-salt solutions trend green, and humidity, temperature, and substrate prep all influence the outcome. The result is unpredictable in detail but reliably accelerates what would otherwise take decades into a few months.
Practical note for residential roofs: we'd generally recommend against accelerated chemical patina on a brand-new copper roof unless the owner has thought it through carefully. The results are uneven, hard to reverse, and depend heavily on weather during the treatment period. For decorative copper accents — cupolas, finials, dormers — accelerated patina is a fun option. For a whole roof, most owners are happier either coating it (to preserve the new look) or simply letting nature handle the patina on its own timeline.
Resources for Further Reading
- Everbrite Protective Coating — product page
- Everbrite FAQ — application, removal, and reapplication guidance
- Copper Development Association — green patina finishes and Frank Lloyd Wright's formula
- Copper.org — architectural copper resources
Need Help With a Copper Roof Project?
Whether you're looking to install a new copper roof, coat an existing one with Everbrite, or restore a historic copper installation that's been allowed to patina, we'd be glad to take a look. Copper is one of our favorite materials to work with — done right, it's a roof your grandchildren will inherit.
Call Caldwell's Roofing at (334) 332-7799 to schedule an estimate for any copper roofing work in the Auburn, Opelika, or surrounding Lee County area.